Digging a hole to plant a tree is neither as hard nor as easy as it's made out to be.
With our step-by-step guide, you'll be able to confidently plant a tree knowing it will thrive and provide shade for future generations. While this guide is for trees, all the same steps apply to planting shrubs too.
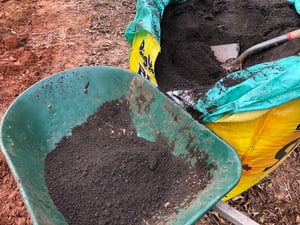
Because we make compost, we are frequently asked about backfilling a planting hole with our rich organic matter. Let's address that upfront: the answer is no! Return the soil you dug back into that hole. Instead, topdress the area with our compost to enrich the ground from above. We explain more about this under point 8 and point 10 in the details section below.
Follow These 12 Steps When Planting a Tree
Here's a quick, at-a-glance reference. We go into detail further down the page.
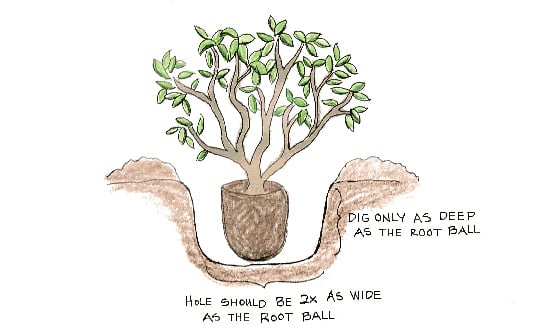
- Hole width: Dig a hole that is twice as wide as the rootball of your tree.
- Hole depth: The hole should only be as deep as the rootball.
- Score root masses: Score any masses of roots with pruners to encourage further branching and new roots.
- Remove potting mix: remove as much of the potting mix as possible.
- Cut circling roots: Cut away any roots that have curled around inside the pot.
- Protect root flair: Uncover and expose the root flare at the base of your tree.
- Plant on same level: Plant your tree so that the top of its rootball is even with the land around it, up to a half an inch high if necessary.
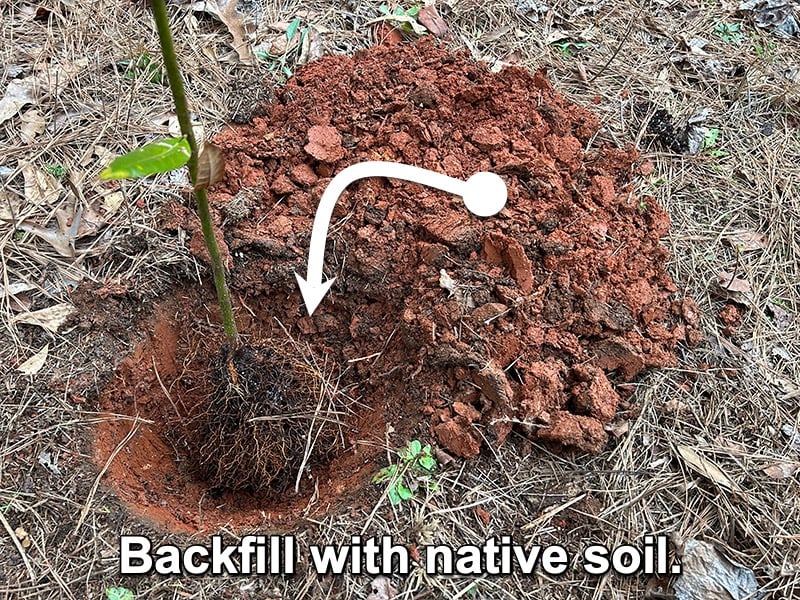
- Backfill properly: Backfill the hole with the native soil you removed earlier.
- Plan for irrigation: Plan for irrigation, such as laying drip tubes.
- Topdress with compost: Spread a layer of Soil³ compost to add nutrition and improve your soil's quality.
- Spread mulch: Cover the Soil³ compost with a layer of mulch to conserve water and prevent weeds.
- Water, water, water: Water daily for the first several weeks, gradually tapering off to every-other-day and then a couple times a week after that. In the summer months, water according to your tree's specific needs.
12 Steps in Detail
Eager for more details? The following 12 steps mirror those above and explain them more thoroughly.
- Hole width: Digging the hole twice as wide breaks up enough soil to make it easy for the roots to penetrate the surrounding soil and become established. When digging in wet or moist clay, be sure to score and rough up the sides of the hole with your shovel; otherwise, those smooth sides formed by the digging shovel may form a barrier to roots penetrating into the surrounding soil.
- Hole depth: Here you are spared a whole lot of extra work because if you have a 7" tall rootball, you only need to dig the hole 7" deep, not twice as deep as the rootball. If you dig too deep, toss some dirt back in. Or set the plant in, back fill and water in, then grip the rootball to tease it back up - this process will allow dirt to fill in underneath the plant.
- Score root masses: When grown in containers, the roots of trees often become what is called "pot bound." If there's a dense and tight root ball, you'll actually be helping it if you take pruners and break apart that root ball so it's loosened. It's just like pruning - each cut of a branch usually results in two more branches filling in that area. Same with roots, they will branch out to become a greater root system. By making cuts on your tree's roots, more will grow and create a bigger network that helps it become firmly established.
This excellent video covers the pointers in sections 3, 4, 5, 7, and 11. However, under the mulch layer, we recommend a layer of Soil³ compost.
- Remove potting mix: Remove as much of the potting mix as possible from around the roots, be it bark fines or a peat-based medium. When you position your plant and backfill with the native soil, you want all the roots you can to be in contact with that native soil.
- Cut circling roots: Look for roots that behave badly and cut them off.
- Roots that hit the side of the pot and circle horizontally;
- Roots that hit the side of the pot and go straight down;
- Roots that hit the side of the pot and wrap back over the root ball (this would cause a girdling root). These are also called "J" roots because of their shape. They are typically obvious.
- Protect root flair: This step is not talked about as much as it should be. Look around in the forest or any place shrubs or trees have planted themselves. You'll see how the base of the woody plant gets fatter and flares out - there may be big woody roots visible before they dive into the earth. This area of the plant is called the root flare. It's important to keep it exposed to air and not bury it underground. Sometime in nurseries when cuttings are stepped up into larger pots, this root flare gets too far under the soil. Now is an ideal time to check on root flare and uncover it if necessary. That will set things right going forward.
- Plant on same level: Now it's time to plant! When placing your tree in the hole, make sure the soil line of the root ball is even with or slightly higher than the native soil line - you can even safely plant 1 or 2 inches higher. A little higher is better than a little lower. Again, this is to protect the root flare and keep it above the soil line.
At this point, I take a little time to think about the plant structure - which side do I like the best and will see most often? It may require digging up and re-situating the tree if you are not happy with its orientation. Thankfully, this is easy since the hole is already dug. - Backfill properly: Once the tree is situated, backfill the hole with the native soil you dug out. It's important to not amend this area with compost when planting a single tree. The roots will enjoy this area too much and won't grow far and wide into the surrounding soil. This phenomenon is referred to as the "bathtub effect," because a comfortable and contained area was created for the roots. Roots need to reach out into the surrounding soil for stability and strength, otherwise the tree will be unable to withstand strong winds or access more water from a larger range.
- Plan for irrigation: If using drip tubes or soaker hoses, lay them now so they end up under the mulch.
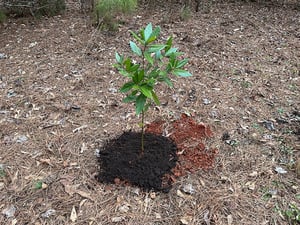
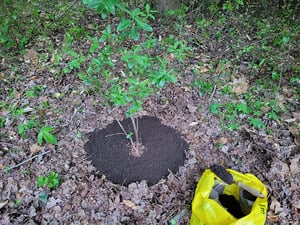
- Topdress with compost: Once you've backfilled with the native soil, spread a layer of Soil³ compost to add nutrition and improve your soil's quality. The nutrition in our compost will percolate down into the soil and will feed your tree from above. Soil³ also adds and encourages beneficial organisms and microorganism that will improve the soil structure, aeration, and nutrition. Those same organisms will help bring the compost further down into the soil. Some feeder roots may spread up into compost layer, but most will grow downward.
Because I'm in a new home, I topdress all my new trees and shrubs with Soil³ compost when I first plant them and for several years afterwards, until they grow too large or until the soil is looking richer and darker with a nice organic matter layer. Some shrubs that thrive in rich soils, like roses, blueberries, and hydrangeas, I topdress with compost almost every year.
Please read our entire article dedicated to the art of Topdressing Trees and Shrubs with Compost.
When topdressing trees and shrubs, I use the straight compost version of Soil³, not the Veggie Mix that has the 25% bark. Veggie Mix is better for building in-ground beds, raised beds, or filling containers.
Amount of Soil³ compost to use for topdressing:
3-gallon tree or shrub
use 1 Mini Cube of compost or 6 shovelfuls of compost
1-gallon tree or shrub
use 1/2 a Mini Cube of compost or 3 shovelfuls of compost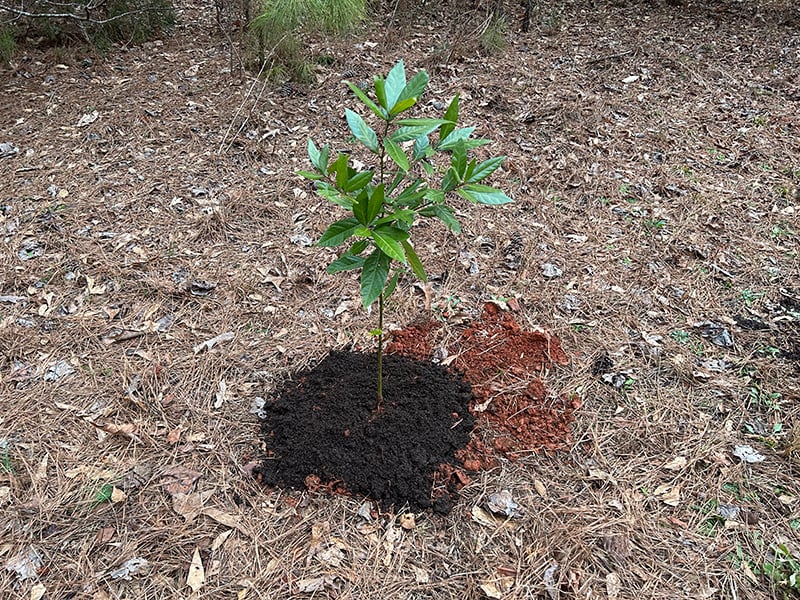
- Spread mulch: Spread mulch to a depth 2-4 inches, but keep it 2" away from the trunk(s) of new trees (mature ones too). Mulch is a cover for insects that protects them while they attack your tree, so if you leave the 2" mulch gap, insects are less likely to damage your tree. Another reason to keep mulch from touching a tree is to prevent the root flare (talked about under steps 5 , 6, and 7) from being smothered - for this reason we advise you to not put a mulch volcano around your tree!
Brie's informative video shows you exactly what root flare is and shows you how to mulch your trees correctly.
- Water, water, water: Water daily for the first several weeks, especially if planting in late spring or summer when it's hot out. Gradually back off to every-other-day, then monitor the ground moisture to see if you can step it back even more to watering it only several times a week. Monitor the ground moisture to see if you can further step it back to watering twice a week, then once a week. Monitor the tree until full dormancy in the autumn or until you're sure the tree's roots have recovered from transplanting and grown into the surrounding soil.
Next spring/summer, water according to the particular shrub's requirements. General rule of thumb is to provide at least 1" of water per week. If it rains 1/2" inch, then water a few days later to provide the rest. A rain gauge will become your best friend.
Regarding watering in fall and winter, you can mostly rely on Mother Nature. Dormant, deciduous trees planted in the fall or winter don't need to be watered unless there's an unusual winter drought. However, if you plant a dormant evergreen (broadleaf or needle) and it has not rained in a week, you will need to monitor these new trees. If the soil is still damp from the last rain, they should be okay. Because evergreens still have leaves, they can lose water through them and dry out and die, especially on windy, sunny days, even though they are dormant (i.e. not actively growing).
Jim's video explains how to water new shrubs (it applies to trees too) in the first few years.
Avoid These 5 Things When Planting a Tree
What’s good instruction guide without a quick run thought of what to avoid?
When planting a tree, it’s important to keep in mind the following five things you don’t want to do.
- Don't dig the hole deeper that the size of the root ball you're about to plant.
- Don't plant your tree too deeply, burying its root flare.
- Don't backfill with potting mix or compost instead of native soil.
- Don't forget to spread mulch.
- Don't forget to water regularly, especially the first year.
Best Time of Year to Plant a Tree
Fall is for planting!
In the Southeast where Soil³ is based, autumn is the best time of year to plant a tree. Obviously, they need less watering when they are dormant, especially deciduous species (i.e., they lose their leaves in autumn).
Another huge advantage to fall planting is that our ground hardly freezes and when it does, it is not for very long. Plant roots continue to grow when the soil is above 50 degrees. Yes, you heard me right, roots continue to grow even when branches are dormant. This gives their roots a head start on the dryer conditions of summer and plenty of time to fan out into the surrounding soil where they can access more water.
However, I plant through spring as long as temperatures are cool out. Planting in February when spring kicks off is still gives trees several months of a head start on summer heat.
I do plant through summer if I promise myself I'll water it almost daily. (Why almost daily? Because the roots have not spread yet - they still think they're in pot!)
Accept Some Transplant Shock
I plant a lot of trees and shrubs and the fact is that even with the best techniques honed over 30 years of planting, some trees don't make it through their first year (the hardest year). They can succumb to transplanting shock even under the best of care.
A success rate between 60-70% is considered doing great while 80% tree survival means you're a gifted gardener or lucky!
Because of transplant shock, I've taken to planting extra so as not to be left without any if one doesn’t take root. By planting denser, I'm covering more ground or adding thicker screening. If they all survive and one starts crowding out the other, I either chop it down or move it, depending on the circumstances.
Have we missed an important step or could have explained something better? General questions? Let us know. If you have a question, that means other do too. They may be too shy to ask. Be the bold one.

![How to Level Your Yard With Level Mix [video]](https://blog.soil3.com/hs-fs/hubfs/level_mix_2048x1365.jpg?width=300&name=level_mix_2048x1365.jpg)
Did this help you out? Have any questions for clarity? Leave a comment below!