
Breaking Ground on a New Garden
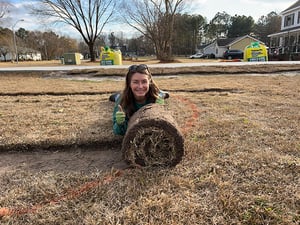
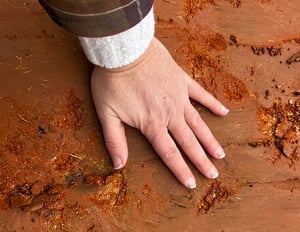
In the picture above, I'm rolling up the lawn to make room for a new native plant garden! At the same time, I'm going to use that roll to patch a bare area of my lawn.
Watch for several more blogs to be posted in the upcoming weeks about the progress on my native plant garden that I started a year ago. This series, called "Building a Native Plant Garden from Scratch," is meant to inspire and educate you through my successes and failures in developing this new garden in Fuquay-Varina, NC from the ground up.
Today we'll start with breaking ground and soil prep for native plants.
Soil Preparation for Native Plants
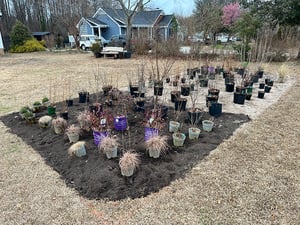
After more than a year of planning, I broke ground on our neighboring house and property, known on Airbnb as the “Carolina Garden House.” It was an exciting time as we embarked on building a brand-new space focusing on North American native species.
When presented with the opportunity to purchase the house next door and the subsequent half acre of flat, full sun, blank canvas property, my husband David and I didn’t hesitate. When we completed the home renovations and had the property steadily rented, we then took on the front yard!
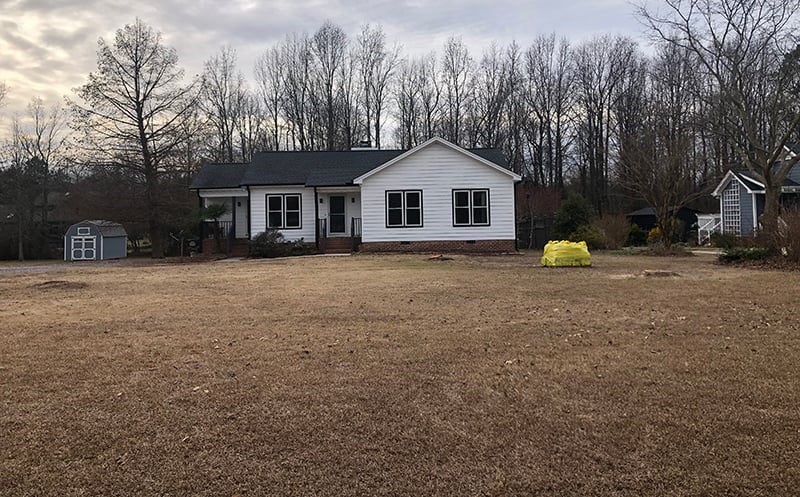
Here's what the Carolina Garden House looked like before we started gardening:
This is the fourth personal garden I have built from scratch in my twenty years of living in The Triangle area of Raleigh, NC. A lot of lessons have been learned, and my strategy for creating this space is quite deliberate and efficient. My mantra is “work smart not hard” so this installation went better than ever! Here are a few pointers to keep in mind before you start building a new garden.
#1 GET TO KNOW THE SPACE
It is important to understand the environment in which you are building a garden.
In this case, it is easier than most since we have been gardening next door for more than a decade. But even with our intimate knowledge of the sun patterns and soil texture, the original design plan changed dramatically as we better understood the flow of traffic and use of the space. In the long run, it will pay off if you give yourself time to fully examine the land and your realistic use of it.
#2 IDENTIFY THE NECESSARY TOOLS
In previous garden builds I skipped this step, and it made the process much harder.
This time around I made a list of what needed to be done, then figured out the appropriate order and what tools would make each job simple. Spoiler alert: you may not own all the tools you need!
There is nothing wrong with renting equipment or hiring professionals to make the process efficient. In our case we hired an arborist to remove and stump-grind all the existing trees, including undesirable Bradford pears, a sick red maple, and an inappropriately placed river birch.
This left me with a blank slate to design. When it was time to get the beds created, we rented a sod cutter to easily remove the Centipede turf which we transplanted along the driveway.
Watch this video to see what it looks like to use a sod cutter:
#3 INVEST IN BED PREPARATION FROM THE START
Everything is easier when you do it right the first time, and this is especially true with garden bed preparation.
📝 Note: We REMOVED existing grass, including the root system, and didn’t just lay cardboard over it. That is because when you have vigorous, warm season turf (such as Bermuda, Centipede, and Zoysia) the cardboard-layering method doesn’t work - trust me, I have tried!
With the turf completely removed it is easy to layer organic matter such as Soil³ in the bed BEFORE planting!
Watch this video to see exactly what we did to get the soil prepped:
Since this garden will be planted with native species that prefer lean soil, I decided to use a mix of all three Soil³ products. We ordered:
- 2 bags of traditional rich hummus compost
- 2 bags of Veggie Mix (75% compost and 25% bark fines)
- 2 bags of Level Mix (70% sand and 30% compost)
We spread the BigYellowBags about 4-5” thick before we dug any holes. I wanted to make sure to not create beds that were too rich with organic matter as that can cause the native perennials to grow too vigorously and flop over time. However, having beds that have enough compost to retain moisture is critical, as I discovered during the drought last summer.
I am thrilled to report that everything we planted has thrived with all three Soil³ products, and I plan to continue making new beds with this same formula.
In this video Abby and I spread 3 BigYellowBags like superheroes!
For your enjoyment, here is a playlist about designing a new native plant garden, as captured through my YouTube channel:

See you next time for more of the story about creating a native plant garden from scratch.
Brie the Plant Lady
All photos & videos by Brie Arthur.
Related Posts
Rotating Crops for Healthier Plants and Better Soil
Growing Cover Crops to Protect and Rejuvenate the Garden

Building a Native Plant Garden from Scratch - Part 3: Grasses, Sedges, & Perennials
Soil Problems Solved by Adding Compost
Did this help you out? Have any questions for clarity? Leave a comment below!