If you want to grow a fall garden, but have limited space to grow, this blog is for you!
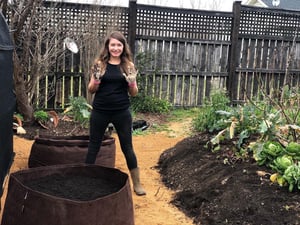
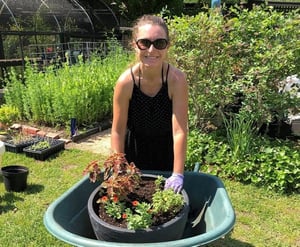
Hi, I’m Milan. On social media, I go by @ATLGrow. I’m an urban gardener based in Atlanta, GA, Zone 8a.
Today, I’m going to show you how you can grow a fall garden using fabric grow bags.
After a hot and dry summer, I was excited to grow my first fall garden. The outdoor temps are much more comfortable and the pest pressure has been much lower.
I started off the fall garden season by direct sowing seeds in my raised beds. My brassicas and root crops are doing really well even though we had a very early first frost in October.
With my raised beds being full from my first round of planting, I’m extending the garden to the front yard using grow bags and Soil³.
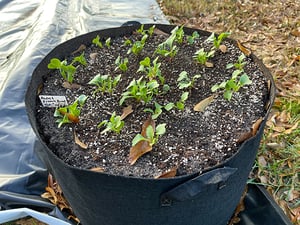
Here are five cool-season vegetables that I’m growing in the new garden.
Beets
The first crop in my fall grow bag garden is beets.
Beets are a sweet, sugary, cool weather root vegetable.
I’ve had success growing them in early spring, so I’m hoping for an even better harvest this fall/winter.
Much like carrots, radishes, and many other root vegetables, beets are quick to mature and thrive when sown directly outside in the garden bed or containers.
The variety of beet that I planted is the Bulls Blood Beet. It’s a classic French heirloom that produces sweeter, darker beets.
Beet Planting Tips:
- Beet seeds should be planted ½" deep in loose, well-draining soil, with 3-4” between each hole.
- I use Square Foot Gardening as a guide when growing in small spaces. According to the guide, 9 beets can be grown in 1 square foot of gardening space.
- The seeds should germinate in 5-10 days. Beet seeds will need plenty of moisture while germinating, so keep the soil moist until they sprout.
- These beets can thrive in conditions with full sun or partial shade, so they are well suited for our shorter fall days.
- Bulls Blood Beets mature in 50-60 days after sprouting.
You’ll know that they are ready to harvest when you see an inch or two in diameter of the roots through the top of the soil. You can let them grow up to 3-4” and they’ll remain tender.
Beet greens can be harvested like lettuce or any culinary herb when 2-3” tall. Small tender greens can be enjoyed fresh in a salad mix while larger, coarser greens taste better when lightly sautéed.
Carrots
The second crop in my fall grow bag garden is carrots.
Carrots are a popular root vegetable that grows well in loose, sandy soil.
The variety that I’m planting is Danvers 126. It’s an heirloom carrot that dates back to the 1940s. These carrots will grow about 6-7” long, which makes them ideal for grow bags and shallow containers.
They are known for being sweeter carrots, so they are worth trying if you have picky eaters in your family.
Carrot Planting Tips:
- Like many root vegetables, Danvers 126 carrot does not transplant well and should be directly sown.
- Before sowing my seeds, I like to make sure that the soil is watered in well to avoid the seeds from being washed away later.
- Carrot seeds are really small, so I’m planting them about ¼” deep and around 2” apart.
- Using Square Foot Gardening as a guide, I’m growing 16 carrots per square foot.
- Carrots can be a little tricky to germinate. They can take from 14-21 days to sprout, and you need to keep the soil moist during this entire time.
- Something that worked well in my raised beds was covering the freshly sown seeds with cardboard for the first 7 days or so. If you do this, be sure to check daily to make sure that the soil bed is moist, and remove the cardboard once you see signs of seeds sprouting.
- Once sprouted, Danvers 126 carrots mature in 65-70 days.
You’ll know that they are ready for harvest once you see the orange root starting to protrude from the soil.
Kohlrabi
Now crop number 3, I have to admit, is new to me. It’s Kohlrabi. I saw it at the farmers market early this year and I’ve been interested in growing it ever since.
Kohlrabi is a unique variety of Brassica which is grown specifically for its wide stem rather than its leafy greens or roots.
Like some other Brassicas, Kohlrabi is fairly disease resistant and is believed to taste better after a few light frosts. So, It should do really well with our mild fall/winter growing season.
Kohlrabi is versatile in the sense that it can be started indoors and then transplanted to the garden, or it can be direct sown as I’ve done.
Some planting guides say that Kohlrabi doesn’t thrive in containers, but I’m hoping it will do well in these larger grow bags.
Given the size of these bags, I’m actually planting two different varieties.
The first is Early White Vienna. It is a smaller variety with a slightly faster growth rate. It matures in around 55 days once sprouted.
The second is Purple Vienna. As you could probably guess, it will be purple in color and larger than the Early White. This one matures in around 63 days.
Kohlrabi Planting Tips:
- Kohlrabi seeds should be sown ¼ inch deep every 6-8 inches.
- Using Square Foot Gardening as a guide, I’m going to plant 4 per square foot. If you get more than this during germination, just thin them to desired spacing.
- I’m staggering the sowing of the seeds so that they have ample room to grow.
Kohlrabi is best harvested as a young plant once the stem is 2-3” in diameter. The bulbous stem gets woody and bitter if they get much larger than 3”.
I’m really looking forward to seeing how they do here in the garden.
Parsnips
This 4th crop is another new one for me. It’s the parsnip.
Parsnip is one of the lesser-known root vegetables. It is said to grow similar to carrots.
I’m trying the All-American Parsnip. It has sweet, tender roots that are about 2” wide and about 12” long.
Parsnips Planting Tips:
- These parsnips should be planted about ¼” deep every 3-4”.
- Using Square Foot Gardening as a guide, I’m going to plant 9 per square foot.
- Very similar to carrots, germination can be tricky. So, I’ll be covering these with cardboard as well. Just until I see signs of sprouting.
- I will provide them with consistent moisture until maturity, cutting back on watering once they mature to reduce cracking.
- The All American Parsnip is a bit of a longer grow, needing 130-140 days to mature. I would imagine that they will be on the longer side given our shorter fall days.
Parsnips are ready to harvest once their foliage has died back, and started to bow over.
These will be a learning experience for me, so I’ll be sharing the lessons I learn along the way.
Radish
Crop number 5 is the tried and true radish.
If you’re just getting started with gardening and want to quickly experience the joys of gardening, plant radish.
I’ve found them to be one of the fastest and easiest vegetables to grow.
The variety that I’m planting today is French Breakfast. These radishes have a blunt and oblong shape which are mostly red with some white at the tip.
They grow so quickly that you’re better off directly sowing them.
Radish Planting Tips:
- French Breakfast Radish should be planted about ½" deep, every 3 inches or so.
- I’m planting 9 per square foot.
- If you are growing these for the first time, you’ll be excited to see germination in 3-7 days.
- Plant them in an area that gets full sun to take advantage of their rapid growth.
- French Breakfast radish mature in a lightning quick 25 days.
Like the other root vegetables that I’ve planted, you’ll know they are ready when the red roots start to push them up out of the soil.
The root has a peppery pungent taste and the greens can be enjoyed raw or sautéed.
Materials Used:
- My seeds are from True Leaf Market.
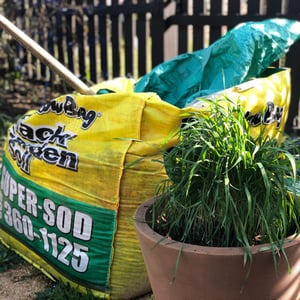
- I’m growing these in 30-gallon grow bags from BootstrapFarmer, but Soil³ also sells grow bag kits.
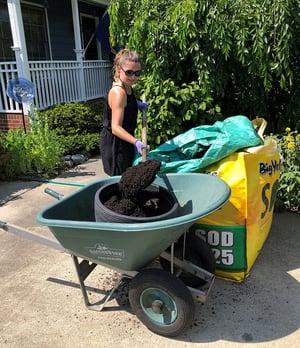
- My growing medium is is a 50/50 blend of Soil³ compost and potting mix. Since I wrote this, Soil³ launched Veggie Mix, a potting soil that's a 75/25 blend of their compost and bark. It's designed for grow bags, containers, and raised beds.
Related Soil³ Articles:
That wraps up 5 of the fall vegetables that I’m growing in grow bags. I hope you’ll come back and follow me on social @ATLGrow for harvesting updates and other urban gardening adventures.
See you next time!
Milan
All photos and videos by Milan Turner.

Did this help you out? Have any questions for clarity? Leave a comment below!