![Natural Pest and Disease Control [Video]](https://blog.soil3.com/hs-fs/hubfs/Soil3%20BLOG/natural%20pest%20and%20disease%20thumbnail.jpeg?width=300&name=natural%20pest%20and%20disease%20thumbnail.jpeg)

Have you ever heard of a ha-ha wall? And, no, it’s not a wall full of the best knock-knock jokes in existence.
In the early days of English lawn development on expansive estates, the rich and powerful wanted to look across their sprawling estates with an uninterrupted view. However, grazing livestock weren’t welcome on the pristine lawns and gardens that led up to the mansions. The ha-ha wall did away with the need for a fence to guard the lawn by creating a sudden, steep drop-off. It was essentially a ditch to keep animals out without any hardscaping to inhibit the view from the house because the hardscaping is hidden down slope from the house. It was as if nobles could say, “Look at all this land I have that doesn’t even need a fence!”

Ha-ha wall in Scotland. Photo by Andrew Shiva, Wikipedia, CC BY-SA 4.0
Expensive? Yes! Surprising for anyone strolling along the lawn? Of course! Presumably, the exclamation of surprise when someone encountered a ha-ha wall is just how it got the name.
While ha-ha walls in early lawns were a sign of wealth, the type of wall construction we’re sharing today is actually one of the least expensive garden walls you can build. It’s perfect for beginner stone masons who want to spruce up the landscape without breaking the bank or committing to brick and mortar.
Watch Daniel and Shannon's video for all the basics.
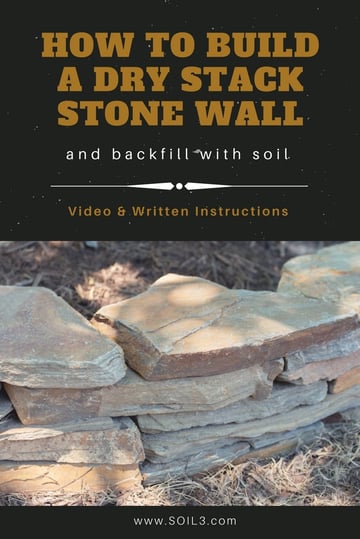
Follow along below for the written details on building your very own dry stack stone wall. Then, backfill soil into the bed for a healthy and beautiful landscape.
The design solution for beginners
If you’ve never braved stone masonry before, a dry stack stone wall is an easy place to start. It will make you familiar with stonework and give you some experience wielding a stone hammer before adding mortar, concrete, and huge rocks to your supply list. Because the wall doesn’t require any adhesive, it will easily forgive rookie mistakes. Just unstack and start anew if you don’t love the look of it!
This gets even the beginner excited, but there are a couple of key points you should keep in mind before you start designing this wall in your head. Dry stack stone walls like the one we’re demonstrating today are only meant for edging, not as a retaining wall. Also, the maximum height for stability purposes, is 10 to 12 inches.
Got it? Now we’re ready for the step-by-step instructions.
Choosing the Right Stone
When choosing your stone, select pieces that are very flat. These are easier to work with than bumpy stones. For a short wall, we also suggest choosing thin stones because they’ll give your wall some nice dimension and add to the aesthetic of your landscaping.
Once you’ve purchased that stone, sort and select pieces that will look nice next to each other and fit together like puzzle pieces on the wall.
Select stones that have similar widths for your different levels of the wall. Large, unsightly pieces can be used at the base of the wall, but you’ll want to set aside large, pretty pieces for the top of your wall.
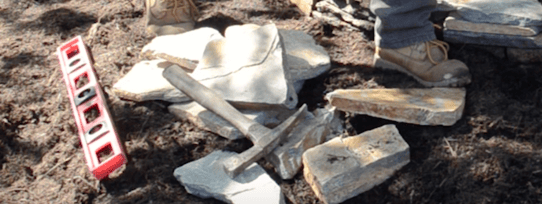
Choose flat, thin stones for building a short wall, and sort them before you begin building.
Bottom Level
Level out the area beforehand. If your wall is going up a slope, you won’t need to dig as deeply into the ground in the higher areas.
Lay down the big base stones for the first layer. While it doesn’t have to be perfect, you’ll want to make sure each layer of stone is at the same approximate level. Checking with a level tool after completing a layer is a good way to check this.
Wall Aesthetics
For a uniform look when building your layers, keep the straight edge of the stone along the front of the wall. The back won’t matter as much because no one will see it. However, if you prefer a more rustic, natural look, you can express your style by showing the bumpy edges on the outside.
Try to overlap the stone whenever possible so there is no seam running down the middle of the wall. Staggering the stones like brickwork will make the wall stable and look professional, too.

Overlapping stones whenever possible will give your wall stability.
Use a stone hammer to shape your stone to fit with other pieces. Carefully selecting your stones beforehand can minimize your use of the hammer, but it’s a useful tool whether you’re an elementary or advanced mason.
Behind the Wall
Once your wall is at the desired height (no more than 10 to12 inches!) you can fill in behind the wall with gravel or small pieces of broken stone. This is called rubble, and it’s perfect for adding support and drainage to your wall.
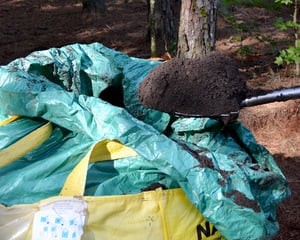
Now it’s time to backfill soil behind your wall. If you’re planting flowers, we suggest a mix of your native soil and Soil3 organic compost.
When backfilling soil, keep this in mind:
- This wall doesn’t have to slope backward into the earth because it is only 10 to 12 inches tall. If it was any taller, you would need to create a lean-back into the soil behind the wall by stacking each progressive layer of stone a few centimeters back from the one before.
- Add your soil for a flower bed or vegetable garden by purchasing in bulk. BigYellowBags are a great solution for when you opt to backfill soil.
- Be careful when building a wall around a tree by ensuring it’s a couple of feet from any exposed roots. You may need to rebuild in a couple of years if the roots start to make the wall uneven. (Luckily you didn’t use mortar, right?) When you backfill soil around the tree, make sure the buttress roots at the bottom are exposed. Soil packed around the exposed roots will slowly kill the tree because this is where it receives oxygen.
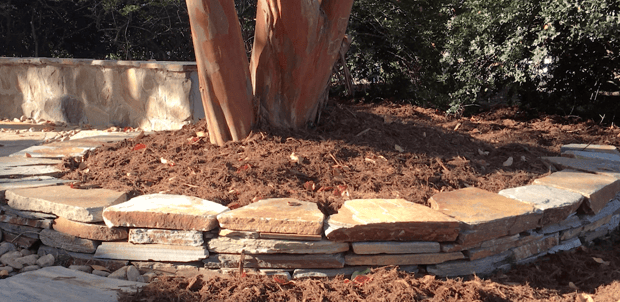
This completed product dry stack stone wall has been backfilled with soil and pinestraw to complete the garden look.
Learn More about Stone
Whether you’re starting out on your stone mason journey with a stone stack wall or think you’re ready to build a ha-ha wall around your estate, Super-Sod is here to help. We offer stonework advice and different types of stone at various locations in Georgia and North Carolina. Our experts would love to help you!
Stone is available at the following Super-Sod and Soil3 locations:
|
North Carolina |
Georgia |
Easily schedule a Soil3 BigYellowBag delivery at the same time you receive your stone delivery. With only one truck driving through your neighborhood and a few hours of building and backfilling, you can have a short dry stack wall filled with compost for healthy planting!


![How to Prepare Soil for Sod Installation: The healthy way [Video]](https://blog.soil3.com/hs-fs/hubfs/Soil3%20BLOG/soil%20preparation%20video.jpg?width=300&name=soil%20preparation%20video.jpg)
![Building an Easy Flat Trellis for Your Raised Bed Garden [Video]](https://blog.soil3.com/hs-fs/hubfs/trellis_for_video.jpg?width=300&name=trellis_for_video.jpg)
Did this help you out? Have any questions for clarity? Leave a comment below!